Friday, December 11, 2015

班兰糯米糕 Kuih Seri Muka


This is one of the numerous good kueh recipes I have collected and tasted. If you follow the steps closely, you will definitely produce a yummy kuih. The outcome is tender with an almost 'melt in the mouth' sensation.
在我所尝试及制做的糕点食谱中,这是其中一道全体都赞好的食谱。你只要跟随着食谱里描述的做法,材料,一定会成功的做出一道好好吃的粿糕。制做出来的糕粿香嫩,能融化于口里的口感。

This is a reduced sugar version and if your are into sweet desserts, I suggest you to add another 10-15% of sugar into the recipe. 
这道食谱是少糖份的,你若爱吃甜的话,我建议多加10至15八仙的糖入第二个步骤的鸡蛋糊里。
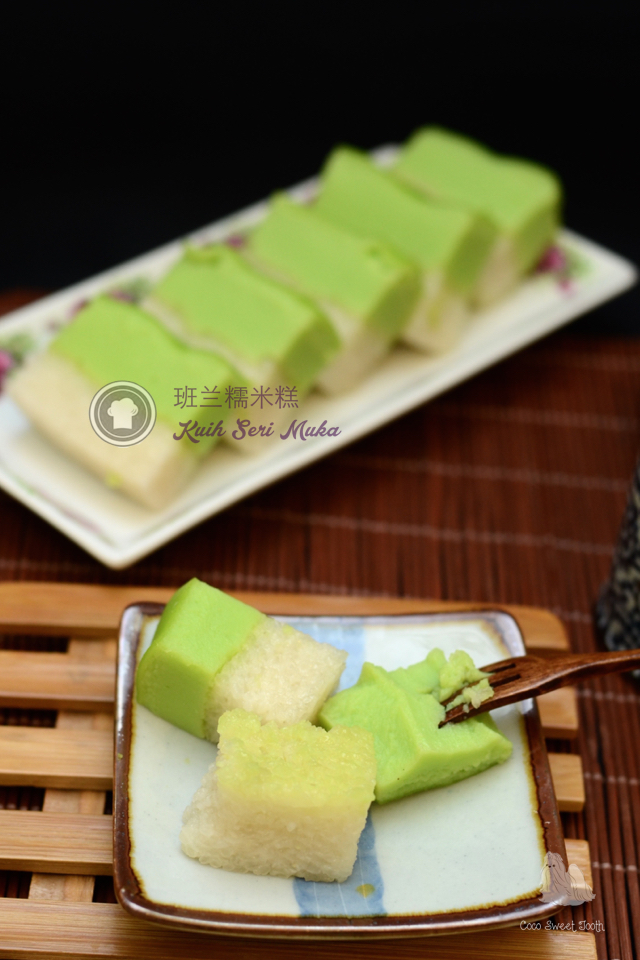
班兰糯米糕 

Kuih Seri Muka

Ingredients
(Pulut Layer 糯米稻)
300g Glutinous Rice 糯米
170ml Thin Coconut Milk 淡椰汁
80ml Thick Coconut Milk 浓椰汁
2 Tsp Sugar 糖
2 Tsp Salt 盐
2 Knots of Pandan Leaves 班兰叶

Method 做法

Wash and soak glutinous rice for at minimum 4 hours or more.
把糯米洗净后泡水至少4小时。

Drain away the water and transfer soaked rice into steaming tray and steam on high heat for 10 mins.
将米水濾干倒入蒸盆以大火蒸10分钟.

Stir in the sugar and salt to the thin coconut milk until combined. Pour the mixture over the steamed glutinous rice and toss to evenly coat the coconut milk over the rice.
把糖和盐混匀入淡椰汁。再将淡椰汁加入糯米,混合均匀。

Transfer the glutinous rice back to the steamer and steam for another 10 mins.
之后再次放入蒸锅以大火蒸10分钟。

Add the thick coconut milk into the glutinous rice and mix well. Send the glutinous rice back to the steamer and steam for another 5 mins. 
倒入浓椰汁,拌匀后又再把糯米放入蒸锅蒸5分钟。


Discard the pandan leaves.
去掉班兰叶。

Line the bottom of a 20x20cm square baking tray with banana leaf or aluminum paper. With a spatula or back of a spoon, firmly press the steamed glutinous rice into the baking tray. Steam the glutinous rice layer for another 10 mins.
准备一个20x20cm方形蛋糕或烤模,模具的底部铺上一层焦叶或铝纸都可。用刮刀或汤匙的背部用力地把蒸熟的糯米饭紧密的按入烤盘里。再次将这糯米层蒸10分钟。


(Custard Layer 椰蛋层)
6 Eggs 鸡蛋
150g Castor Sugar 糖
300ml Thick Coconut Milk 浓椰汁
4 Tbsp Plain Flour 面粉
1 Tbsp Rice Flour 粘米粉
1/4 Tsp Salt 盐
Few Drops Pandan Extract 班兰精
1-2 Drops Green Food Colouring 绿色食用色素

Method 做法

Combine eggs and sugar until evenly dissolved.  Strain egg mixture into a double boiler.
把鸡蛋和糖混匀后沥入个双锅炉。

In another bowl, sift the plain flour and rice flour together. Add coconut milk and combine until the batter is smooth. Sieve the mixture into the the earlier egg mixture.
再准备另一个盆里,一起沥入面粉及粘米粉。混入浓椰汁搅拌均匀再沥入之前的鸡蛋双锅炉里。


Stir in salt, pandan extract and food coloring until combined.
加入盐,班兰精及绿色食用色素。

Stir the mixture over a pot of boiling water until the batter is thick enough to coat the ladle / spoon.
把双锅炉放入已煮滚着热水的锅里,不停的搅拌鸡蛋糊,以慢火煮至浓稠至汤匙表层能粘上糊液即可离火。

Pour the custard batter over the glutinous rice layer and steam the custard over medium heat for 15 mins.
将面糊倒入已蒸好的糯米层,以中火蒸15分钟。


Reduce the heat low and continue to steam the kueh for 20-25 mins until thoroughly cooked.
把火调低再以小火把粿蒸20-25分钟至熟透即可。

Place the tray on a wire rack to cool prior to cutting.
待冷切后才方可切成片状。


Thursday, December 10, 2015

韩式麻薯面包 Korean Mochi Bread II

Several months ago I made a batch of these korean mochi bread from scratch as I couldn't get hold of the required korean mochi premix flour from Jakarta. This time round I managed to buy a few packets from Taobao China and get it delivered to the hotel when my hubby was in Shanghai for meeting.
上几个月前,我曾在博客里分享类似的麻薯面包食谱。就因为当时找遍了整个雅加达都买不到麻薯面包预拌粉料才逼不得已得靠自配从零开始的方法及配料做成那批面包。恰好上两个月前,我幸巧在淘宝网上购买到几份这种韩国麻薯面包预拌粉,而我丈夫又刚好去上海出差几天就顺便要求该网站把货物直接送去酒店好让他顺手带回雅加达。

Crazy it may seem but yes that's what I did since he (hubby) didn't show any resistance when I bought a whole lot of cooking ingredients from China largest online shopping site whereby his job was to bring it back after the meeting.
你或许会想我是否买过火了,我想大概吧。不仅如此,我当时看他(丈夫)没抗议,我又在淘宝网上购买多几样材料让他公干完成后带回国。

From the many blogs I read, most of them used this premix powder as the main ingredient and now I just have got to try it out to compare the difference between the premix version against the earlier version, which were all prepared from scratch.

据许多博客所分享的食谱,大多数都是采用韩国麻薯面包预拌粉来制做这类似的面包。 这次我终于可以比较之前自制和预拌粉的效果。


Outlook wise, the bread look similar. However, this version made from premix flour has better and chewier texture. It taste better too. 

经过这次的试验及制做出来的面包效果后,我还是认为这类面包还是最适合采用麻薯面包预拌粉来制做。面包又可口即服口感。好吃!

韩式麻薯面包
Korean Mochi Bread
Adapted credits my favorite little DIY kitchen

Ingredients 材料

(A)
300g Korean Mochi Bread Mix 韩国麻薯预拌粉
75g High Protein Flour / Bread Flour 面包粉
8g Milk Powder 奶粉
145g Egg 鸡蛋
100g UHT Fresh Milk 鲜奶
75g Corn Oil 玉米油
8g Light Soya Sauce 酱油

(B)
40g Black Sesame Seeds 黑芝麻


Directions 做法


Pre roast black sesame seeds (B) in preheated oven at 130C degrees for 10 mins. Alternatively you may pan fry the sesame (without oil). Set Aside to cool before using.
把黑芝麻放B入已预热130度的烤箱烘烤10分钟。或者是用炒锅以小火干炒至香脆。搁置待凉备用。

Combine all ingredients (A) into the bowl of a stand mixer with dough hook attachment and knead until mixed. Add in toasted sesame seeds (B) and continue mixing the dough for 10 mins. 
将所有材料A倒入搅拌器的钢盆中以中速搅拌搓揉混合均匀。然后再加入黑芝麻B继续搅拌均匀。


Cover the dough with cling wrap for 10 mins.
面团盖上一层保鲜纸把面团搁置10分钟。

Divide and shape the dough into 45-50g round balls and place it onto a greased baking pan. Grease your hand should the dough be too sticky to manage.
平均地把面团分成45-50克的小面团,滚团后再摆上已涂抹油的烤盘。 若是面团过于黏手的话可以连手也涂上少许的食油以便处理面团

Spray some mist of water on the surface of the bread and bake in a preheated oven of 170C degrees for 5 min. Remove the baking pan from oven and continue spraying another coat of water over the surface. Transfer the bread back into the oven and continue baking for another 25-30 mins or until the crust turn golden brown.  
烤盘放入烤箱前,先在面团表层上喷洒一层薄薄的水雾后放进入已预热的烤箱以170℃度烘烤5分钟。再把烤盘拿出来又在面包表表层上喷洒一层水雾续后再把烤盘放入烤箱继续烘烤25至30分钟,直到面包壳变成金黄色即可。


To achieve a crusty texture, spray a layer of water into the oven mid time during baking. 
为了达到面包松脆表层,最好是在面包烘烤的中途时把烤箱门打开然后向烤箱内喷洒水雾,马上关烤箱门继续烘烤面包。

Store any unfinished bread in a freezer or air tight container. Lightly toast the bread with bread toaster for a min or two prior to consumption. 

剩余的面包可保存于冰箱或密封罐子里。到时后再用烤面包机稍微烘烤加热即可。


Do link back to Coco Sweet Tooth if you have used any information as published in this blog.


Monday, December 7, 2015

蓬松伯爵茶素面包 Fluffy Vegan Earl Grey Bread

Ever since the few successful attempt in combining tangzhong and sponge dough method to produce soft fluffy bread without the need for bread softening agents. These days, I will always go back to this method whenever I have the luxury of time and patience to prepare the starter dough as required in the making of such bread.
自从我成功的把汤种与中种面团混合起来制造出蓬松即松软而勿须采用任何面软化添加剂的素面包后,每当时间应许的时候我一定会到回这个方法来制造软面包。这种面包的制做过程稍为花时间及考耐心,整体上算是种爱心面包哦!

This is even more so when I need to prepare vegan bread for my hubby who is on full vegan diet on every Monday, 1st and 15th day of the chinese lunar calendar. If you are a vegetarian, this shall be the ideal and healthy recipe to produce soft fluffy bread which you rarely find in vegetarian outlets. The bread stays soft for several days if stored in airtight container.
虽然我吃长素已有两年多,我的另一半(丈夫)的主要守斋日是每逢星期一,初一十五及任何佛诞日都会吃全日斋。您若也是素食主义者,这将会是一道健康即爽口的全素面包食谱,制做出来的面包松软,就连素食馆也难买到啊!只要把剩余的面包保存在密封的盒子内,面包可保存松软的状态上几天。


蓬松伯爵茶素面包 
Fluffy Vegan Earl Grey Bread

Ingredients 材料

Water Roux / Tangzhong 汤中面糊(A)

50g Bread Flour 面包粉
100g Soya Milk 豆浆
100g Water 清水
1 Sachet Earl Grey Tea Bag 伯爵灰色茶袋

Combine ingredients (A) into a heatproof saucepan and cook over medium heat while stirring continuously until the mixture thickens with no visible lumps. Once the mixture reaches 65C degrees the water roux is ready. I just cook and stir until it has thickened like baby porridge. 
将材料A里的水和高筋面粉加入耐热锅/盆搅拌均匀成面糊,然后以中小火加热,边煮边搅拌一直煮到面糊开始变浓稠就关火继续搅拌至无粒粒或如婴儿粥般就好了。

Transfer the water roux paste to a clean bowl and place a piece of cling wrap directly over the top of the mixture to prevent skin from forming on the surface. Allow the mixture to cool before using. Refrigerate the water roux once it has cooled. I kept the leftovers in the fridge for not more than 4 days.
把汤种面糊倒入一个干净的碗内然后表层铺上一层保鲜纸以防面糊表面上生一层皮。汤种糊一旦冷却后便可加入面包材料里混合。剩余的汤种面糊可收入冰箱不超过4天。


Sponge Dough 中种面团 (B)

200g Bread Flour 面包粉
50g Wholemeal Flour 全麦面粉
5g Instant Dry Yeast 速发干酵母


1 Sachet Earl Grey Tea Bag 伯爵灰色茶袋
50g Water 清水
100g Soya Milk 豆浆

Combine water and soy milk in a mug and heat up the mixture in a microwave for a minute. Infuse the earl grey teabag into the hot mixture and set aside to cool.
将清水与豆浆混合入杯里以微波炉加热一分钟。注入伯爵灰色茶袋于杯内的热豆浆水液直到冷却后即可用。

Combine (B) ingredients into a mixing bowl and knead for 5 mins until a dough is formed. At this point, it is not necessary to knead till the window pane membrane stage. Cover the bowl with cling wrap allow the dough to rest for 2-3 hours before using.
把材料B一起混入搅拌盆中用手揉搓5分钟直到形成面团即可。在这阶段时不需把面团搓至光滑撑得起薄膜的阶段。用保鲜纸盖上碗将面团进行初步发酵2-3小时后才使用。


Main Dough 主面团 (C)
120g Tangzhong 汤种面糊 (A)
Sponge Dough 中种面团 (B)
350g Bread Flour 面包粉
50g Wholemeal Flour 全麦面粉
30g Low Protein Flour 低筋面粉
65g Castor Sugar 细砂糖
8g Instant Yeast 速发干酵母
5g Salt 盐
85g Earl Grey Tea 伯爵灰色茶袋
55g Water 清水
65g Corn Oil 玉米油

(D)
50g Golden Raisins 金葡萄干


Method 做法

In a  bowl of the stand mixer, break the overnight tangzhong (A) into smaller pieces.   Add in sponge dough and the balance of ingredients (C) into the bowl of a stand mixer with dough hook and mix with lower speed until all ingredients are well combined. 
先把汤种面团(A)撕成小块放入搅拌器的钢盆中,再将中种面团及其余材料(C) 倒入,以慢速度搅拌搓揉成为一个不粘手的面团. 

Add in raisins (D) and slowly increase the speed to medium and continue kneading for approx 15-18 mins, until the dough becomes smooth and pass the window pane test.
把金葡萄干D加入然后依照片揉面标准程序继续以中速把面团搅拌(大约15-18分钟)成为撑得起薄膜的面团.


Transfer the dough to a slightly greased bowl, cover bowl with either cling wrap or cloth. Allow the dough to proof for 1 - 2 hours or until the dough doubled in size.
将揉好的面团滚圆, 收口朝下捏紧放入涂抹少许油的盆中, 罩上拧干的湿布或保鲜膜, 放置到温暖很密闭的空间进行第一次发酵约1-2小时钟或至少两倍大.

Test the readiness of the dough with a finger lightly dusted with low gluten or cake flour. The dough is ready when it remain indented after the finger pokes into it.
第一次发酵完成后, 用手指沾上低筋面粉, 然后直接插入面团中心. 如果插出的洞陵没有弹回的迹象, 便完成第一次发酵. 

Punch down the dough. Divide the dough into 2 portions and mould it round. Let it rest for another 15 mins.
工作桌上洒上一些高筋面粉. 将发酵好的面团从盆子中移出.  面团表面也洒上一些高筋面粉, 然后将面团用手压下去将气体挤出来. 把面团分割成2份, 然后滚成圆形, 盖上拧干的湿布或保鲜膜再让面团休息15分钟.


Mould the 2 dough into roulades and transfer both dough into individual rectangular individual grease loaf pan.
将休息好的面团整形成長方型然后圈起来摆入已涂抹油的面包模里。

Spray some water over the surface with a fine mist nozzle. Final proof the bread in a unheated oven for another 50-60 mins.
将烤模放入未开火的烤箱中, 面团表面喷些水然后盖上烤箱门, 再侍发酵50-60分钟至两倍大.

8-10 Mins prior to baking time, remove baking pan from oven and turn on the oven heat to 170C degrees.
发酵好前8-10分钟, 将烤盘从烤箱中取出, 烤箱打开预热刊至170C度.


Cut a few lines over the top of the dough with a sharp blade.
在面团顶部用刀片切割二致三条割痕。


Lightly dust the top with a thin coat of bread flour.
在面团表面上撒少许面包粉。

Bake the buns in the middle level of a preheated oven at 170C degrees for 35-38 mins.
放进已经预热至170C度的烤箱中层烘烤35-38分钟, 至表面呈现金黄色即可.


Sunday, December 6, 2015

巧克力大理石奶油奶酪蛋糕 Chocolate Marble Cream Cheesecake


The month of Oct and Nov this year were the most hectic months for me. I was busy travelling with my husband either on holiday or making numerous trips back to KL to attend to events and running of errands in preparation for the forthcoming house renovation in Malaysia. As much as I would like to share and update my blog with new recipes, I was too lethargic to do so.
上两个月是我整年里最繁忙的月份。这两个月里一直忙着跟老公出外旅行及多次回吉隆坡出席宴会和安排屋子装修事务。虽然多次想在博客里分享新的食谱,我想大概是这次假放得太久而人也变得懒散所以就一直没上博客写作


We just got back from KL for a week and after a whole week of lounging at home with the day to day cooking, my hubby finally asked me when would he get to taste something home bake again. Seeing that he will be commencing another one week business traveling tomorrow, I finally get down to baking mode.
我俩从上个星期从吉隆坡回印尼已有一个礼拜了,就是还提不起劲整天忙些锁碎的家庭事务。一直到昨天我丈夫终于开口要求我制做个蛋糕后,而我又看在他明天开始即将要离家出外公干一个星期,我才逼着自己下手烘焙。

Since I have not been making cheesecake for a while, I decided to settle for this lovely recipe from one of my favorite bloggers Ancoo Journal.
好吧,既然我已久没制造奶油乳酪蛋糕,那就来弄个奶油乳酪蛋糕。食谱取自于我很欣赏的博客 Anncoo Journal


巧克力大理石奶油奶酪蛋糕
Chocolate Marble Cream Cheesecake
Recipe adapted from Anncoo Journal


Ingredients 材料 (A)
375g Cream Cheese at room temp 奶油乳酪(室内回温)
65g Castor Sugar 细糖
5 Tbsp Whipping Cream 奶油
2 Medium Eggs 鸡蛋(中)
1-1/2 Tbsp Self Raising Flour 速发面粉

(B)
375g Salted Butter 咸奶油, softened at room temp (室内回温)
165g Castor Sugar 细糖
7 Medium Eggs 鸡蛋(中)
2 Tsp Vanilla Extract 香草精
255g Self Raising Flour 速发面粉
6 Tbsp Cocoa Powder 可可粉
5Tbsp Milk 牛奶
5 Tbsp Whipping Cream 奶油


Directions 做法

Line base and grease sides of a 22x22x7cmD square baking pan with parchment paper. 
在22x22x7cmD方行烤盘的低及部及旁边铺上抹少许油的烘焙纸。

Preheat oven to 160C degrees.
烤箱预热至160C度。


Sieve the dry ingredients from (B). Combine self raising flour together with the cocoa powder. Set aside. 
将材料B里的速发面粉和可可粉混合后过滤。搁置待用。

In a mixing bowl, combine and beat softened cream cheese and castor sugar from (A) until smooth.
把材料A的奶油乳酪和细糖A混合倒入搅拌盆里打发。

Add whipping cream and mixed until combined before adding eggs. Continue mixing until smooth and fluffy. Stir in self raising flour until combined. Set aside.
加入奶油混匀后再放入鸡蛋继续搅打至松发。拌入速发面粉均匀后搁置待用。


For ingredients (B), combine softened butter and castor sugar into another mixing bowl and beat until pale and fluffy. Gradually add one egg to combine follow by another egg. Repeat the process until eggs are evenly mixed into the batter.
将材料B里的软化牛油和细糖一起倒入另一个搅拌碗以中速打发。顺着次序把鸡蛋一粒粒般混入打发的牛油糊内直到全部混入为止。

Add in vanilla extract, milk and whipping cream until combined.
继续混入香草精,牛奶和奶油至混合。

Using a spatula, fold in sifted cocoa and flour mixture in 2 - 3 portions into the (B) butter mixture and mix well. Add extra milk if batter is too dry to handle.
再用橡皮刮刀把可可速发面粉混合粉分2-3次翻拌入蛋糕面糊。若面糊过干可以再加入少许牛奶以便处里。

Pour half portion of chocolate batter (B) into the prepared baking pan and spread evenly. 
之后再将一半的巧克力蛋糕糊B均匀地倒入蛋糕模。


Spoon in the cream cheese mixture (A) over the chocolate batter (B). Lastly add in the balance of the chocolate batter over the cream cheese mixture and level.
再来便将奶油乳酪糊A用汤匙轻轻地混入B巧克力蛋糕面糊上。最后才把剩余的B巧克力蛋糕面糊铺在奶油乳酪糊A层上。

Use a chopstick and swirl around the batter to create marble effect.
使用筷子在蛋糕面糊里划漩涡制造大理石的效果。

Bake the cake in the middle rack of the preheated oven at 160C degrees for 40mins. Lower the temperature to 150C and bake for another 20-30 mins or until the skewer inserted comes out clean.
将蛋糕模放入已预热的烤箱的中层以160度烘烤40分钟。再把温度调低至150度后再烘烤20-25分钟或致蛋糕熟透即可。


Printfriendly

Related Posts Plugin for WordPress, Blogger...