Do you enjoy eating juicy custard buns? This is one truly good sweet bread recipe adapted from Sweet The Mi which surpasses my expectations and you could also make it without the use of oven...just pan fried!
您喜欢多汁的奶油面包吗?这是一道非常好吃的奶油内陷甜面包取自于Sweet The Mi再加改编,制做出来的面包比预料的好吃。不仅如此这款面包还是用锅烤的,不需用烤箱呢!
I tried making using oven and pan with satisfactorily outcome. The pan fried ones came out soft with a nice crispy crust when hot whereas the oven baked ones have a lingering smell with soft fluffy texture.
结果我还是尝试把面团分成两份,一份用锅另一份采用烤箱。无论任何的其中的烤法都令我满意。用锅烤出来的面包的表皮香脆面包体香软而烤箱烤出的面包带有浓厚的香味面包体蓬松。
The leftover cusrtard cream can be freeze for a month or future use.
剩余的馅料可以冰藏一个月内需用掉。
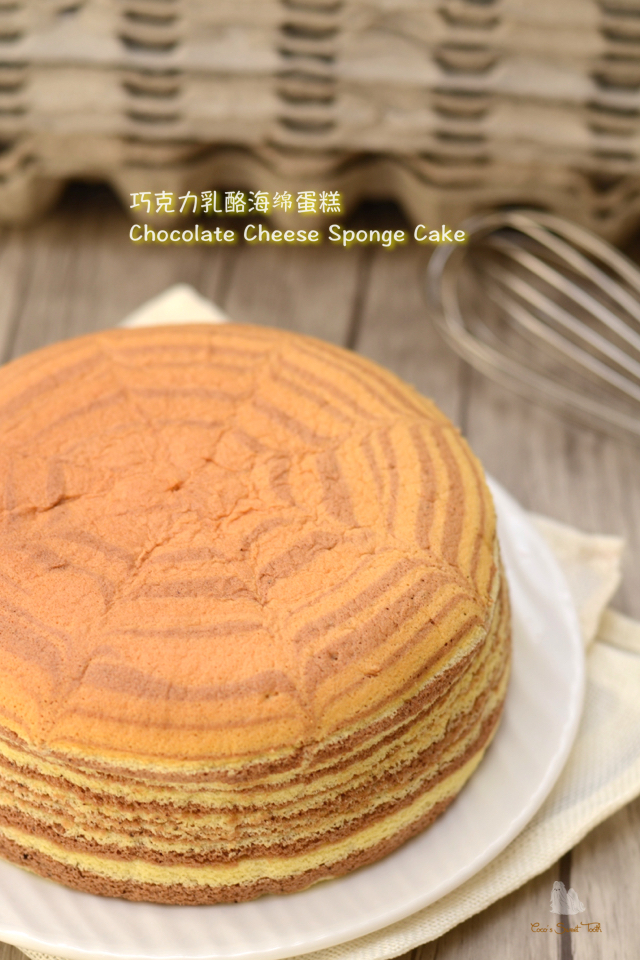
锅烤奶油乳酪面包
Pan Fried Creamy Cheese Buns
Recipe adapted from Sweet The Mi
Ingredients 材料
 Fillings 馅料 (A)
4 Egg Yolks 蛋黄
65g Castor Sugar 细砂糖
25g Low Protein Flour 低筋面粉
300ml Fresh Milk 鲜奶
20g Unsalted Butter 无盐奶油
60g Cheddar Cheese 切达乳酪 (grated 切丝)
1 Tsp Pure Vanilla Extract 香草精
Fillings 馅料 (A)
4 Egg Yolks 蛋黄
65g Castor Sugar 细砂糖
25g Low Protein Flour 低筋面粉
300ml Fresh Milk 鲜奶
20g Unsalted Butter 无盐奶油
60g Cheddar Cheese 切达乳酪 (grated 切丝)
1 Tsp Pure Vanilla Extract 香草精
Bread Dough 面包团 (B)
450g High Protein Flour 面包粉
120g Low Protein Flour 低筋面粉
8g Salt 盐
90g Castor Sugar 细砂糖
8g Instant Yeast 即融干酵母
100ml Warm Water 温水
120ml Warm Milk 温牛奶
40ml Whipping Cream 植物淡奶油
2 Large Eggs 大号鸡蛋
(C)
60g Unsalted Butter 无盐奶油
Method 做法
Boil (A) milk, butter and cheddar cheese together in a saucepan until cheese melted. Add vanilla extract to combine. Set aside.
将A里的鲜奶,奶油和切达乳酪丝一起混入锅用中小火煮把乳酪融化即可加香草精混匀,离火搁置。
Combine and whisk (A) egg yolks, castor sugar and low protein flour together until mixed. Add the warm milk and cheese mixture while whisking continuously to thoroughly blend into the egg yolk mixture without over cooking the eggs. Drain and transfer the mixture back into the saucepan and cook under medium low heat until thickened before removing from heat.
接着就把A里的蛋黄,砂糖和低筋面粉一起混合入一个碗中,搅匀后便可一边快速搅拌一边加之前煮热的奶油乳酪液以免蛋液被烫熟。搅匀后过沥入锅里用中小火把奶油鸡蛋液煮至浓稠即可离火。
Transfer the thickened custard cream into a bowl. Immediately place cling wrap directly onto the surface of the cream until fully covered up. Set aside to cool completely then refrigerate for 1 hour to set before using.
把煮好的馅料转入碗里,立刻铺一层保鲜膜在馅料的表层上,待凉后冷藏1个小时后即可用。
Combine and heat up (B) water, milk and whipping cream in a saucepan until lukewarm within the range of 37-38C degrees. Set aside.
将材料B里的清水,牛奶和植物淡奶油一起混入煮锅煮温至37-38C度即可离火。
With the exception of (C) butter, combine all the ingredients (B) into a mixing bowl and knead till combined.
除了无盐牛油C以外,先把材料(B)混入盆中混合搓匀成团。
Add unsalted butter (C) and slowly increase the speed to medium and continue kneading for approx. 20-25 mins, until the dough becomes smooth and pass the window pane test. The same applies when you are completely kneading by hand.
加入无盐牛油(C)然后依照揉面标准程序继续以中速把面团搅拌(大约20-25分钟)手搓面团也是以相同的标准程序将面团搓成撑得起薄膜的面团。
Place dough into a slightly greased bowl. Cover bowl with either cling wrap or cloth and allow the dough to proof for 1-2 hours or until it doubled in size.
将揉好的面团滚圆,收口朝下捏紧放入涂抹少许油的盆中,盖上拧干的湿布或保鲜纸放置到温暧密闭的空间进行第一次发酵约1-2小时至面团变两倍大为止。
Punch down the dough. Divide the dough into 18 equal portions and mould it round. Let it rest for another 15 mins.
将面团用手压除气体,然后把面团平均分割成18等份, 滚圆盖上拧干的湿布或保鲜膜再让面团松弛15分钟.
Sprinkle the worktop with bread flour, flatten each dough into a disc and wrap in the chilled fillings (A) and seal the edges and mould round. Repeat the process for the balance 17 ps of dough.
台座上撒些高筋面粉,将休息好的面团用擀面棍把面团压扁,然后包入馅料A捏紧收口滚圆。再重复同样的做法把其余的17份面团完成。
Arrange the dough on a baking tray line with individual greased parchment paper. Space the doughs 4 inches apart to make room for the doughs to expand.
将休息好的面团各自排入已刷上不融化牛油的烘培纸置于烤盘上。面团之间应保留4寸的距离,给予面团膨胀的空间。
Final proof the bread in a unheated oven for another 50-60 mins until doubled in size.
将烤模放入未开火的烤箱中, 面团表面喷些水然后盖上烤箱门, 再侍发酵50-60分钟至两倍大.
Preheat a lidded ceramic coated non stick cooking pan under medium low heat for 6-7 mins. Once heated, Gently place in several doughs to fit the pan. With lid covered, fry the bottom side over low heat for 6-8 mins then turn over and fry the other side for another 6-8 mins until cooked. If the buns are still pale you may flip over again on both sides to cook further (with lid close) several minutes to cook until it is fully cooked. Dish and allow the buns to cool on wire rack.
把个带盖的不沾平底锅用中小火烧热6-7分钟,开盖将几份面团置入关上盖转小火。先把底部烤6-8分钟再翻面继续煮烤6-8分钟。若面团还没上色那就需继续不停的翻面(锅盖要盖上)用小火慢慢地把两面烤至金黄色煮熟为止。烤熟后摆入铁架待凉。
(For Oven Bake 采用烤箱的做法)
8-10 Mins prior to baking time, remove baking pan from oven and turn on the oven heat to 200C degrees.
发酵好前8-10分钟, 将烤面团模从烤箱中取出, 烤箱打开预热刊至200C度.
(Optional) Apply egg wash and sprinkle some bread crumbs over the surface.
(自选) 在完成第二次发酵的面包表层上涂上蛋液后撒些面包碎。
Bake in the middle rack of a preheated oven at 200C degrees for 10-12 mins or until golden brown.
送入已预热至200C度的烤箱的中层烘烤10-12分钟至面包烤熟及表面变金黄色即可。
Remove bread from oven and allow to cool on cooling rack.
烤好后放在铁网架上放凉。
Do link back to Coco Sweet Tooth if you have used any information as published in this blog.