After seeing a recent posting by Nasi Lemak Lover on Japanese Condensed Milk Bread, I immediately bookmarked this as my next bread project. I love reading her blog and has gotten lots of inspiration from her works.
 I have made some adaptations to this recipe since I have only chocolate flavored condensed milk during the time of baking. And also, I have added yoghurt and potato flakes hoping to get a even softer bread texture.
巧克力炼奶面包
Ingredients
(A)
300g Bread Flour
5g Instant Dry Yeast
30g Soft Brown Sugar
2 Tbsp Potato Flakes
1 Tbsp Natural Yoghurt
22g Chocolate Flavored Condensed Milk
180g Low Fat UHT Fresh Milk
2 Tbsp Potato Flakes
1 Tbsp Natural Yoghurt
22g Chocolate Flavored Condensed Milk
180g Low Fat UHT Fresh Milk
(B)
30g Salted Butter
(C)
30g Chocolate Flavored Condensed Milk
30g Salted Butter, room temperature
Decoration
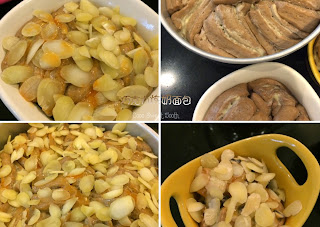
Almond Flakes
Chocolate chips, dried fruit (optional)
Icing Sugar (Optional)
Chocolate chips, dried fruit (optional)
Icing Sugar (Optional)
Directions
- In a mixer fitted with dough hook, combine all ingredients (A) together to form a rough dough. Adjust the input of liquid milk whenever necessary. Add in butter (B) and continue kneading until the dough becomes smooth and elastic. Once the dough is able to stretch to form a window like thin membrane without breaking (window pane test), transfer the dough into a lightly greased bowl and cover with cling wrap.
- Place the bowl in a warm place to allow the dough to proof and rise until doubled in volume. To ascertain readiness, poke a floured finger into the dough. When the dough springs back immediately, it is under proved and needs more time to proof further.
- While waiting for the bread's proofing, mix ingredients (C) thoroughly and set aside for later use.
- Once the dough has doubled in size, gently deflate the dough with your hand. Mould the dough round. Allow to rest for 15 mins.
- Roll the dough into a 36x40cm rectangle and using a pizza cutter, cut the dough into 12 equal strips.
- Brush the condensed milk and butter mixture (C) liberally on the first strip of dough and stack another strip of dough over it. Brush the mixture on the top surface 2nd layer of the dough again and stack the 3rd strip over it. Repeat the process until the 4th strip had been stack up. Set aside.
- Apply the same process for balance 8 strips of cut dough until you get another 2 complete stacks of dough. For each completed stacks of dough, cut each dough into 4 equal portions thus you would have 12 portions in total.
- Transfer and arrange each portion horizontally into a greased 7" round baking pan, or any baking pan of your choice. I only filled the pan with one layer of the dough and use the balance bits on 'greased' muffin cups. You may also try squeezing everything into one baking pan by stacking on two layers (if you have sufficient portions to completely fill up the 2nd layer).
- Cover with cling wrap and leave it to proof until almost doubled.
- Apply egg wash and sprinkle your preferred toppings over the top.
- Bake in a preheated fan assisted oven at 170 deg C for about 30-35 minutes (7" round baking pan) or 15-18 minutes (muffin cups) or until brown.
- Remove the bread from baking pan once cooled. Sprinkle with icing sugar.


No comments :
Post a Comment