
Whilst I frequently heard from my dharma sisters on the use of tofu as one of the substitute to eggs in vegan baking, I have yet to personally try it until several days ago after realizing I had overstock on tofu. With the expiry date drawing near, I finally embark on my maiden attempt by adapting this recipe from a vegan version to this non vegetarian cheesecake.
虽然我经常多次从师姐妹那儿听说有关于採用豆腐来取代鸡蛋来做素蛋糕,我却都没正式去尝试。一直到有一天,无意中在冰箱理找到即将要过期的豆腐干后才乖乖的下手尝试。这份蛋糕食谱是从一份全素豆腐乳酪改做成今天这份好吃即非素原料的芝士蛋糕 。


Why not follow the original vegan recipe completely? Reason because, I do not have access to certain ingredients required in that recipe.
为什么不干脆依照素版蛋糕食谱来做呢? 其实啊,主要的原因是我这里找不到许多原著所采用的材料。
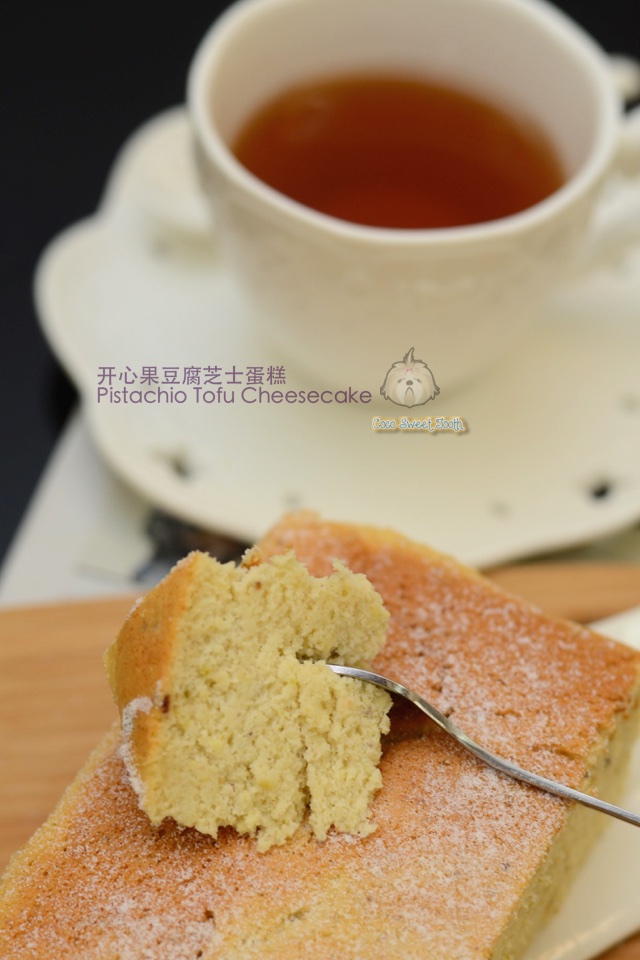 Despite the adaptation, the cake turned out soft and creamy. To reduce the distinct tofu taste, I have added in ground pistachio nuts, cranberries and apple cider vinegar. After all, this is a cheesecake hence it should not let the taste of tofu overpower it.
尽管这份开心果豆腐芝士蛋糕的配方已经过大改编,制作出来的蛋糕非常的柔软滑腻。为了减轻蛋糕里的豆腐味,我刻意添加开心果,蔓越莓干和萍果醋来综合。毕竟,这是一道芝士蛋糕,当然不可让豆腐的味道胜过奶油乳酪咯!
蛋糕最后做出来比预期的要好得多。最重要的是,它是平滑和奶油状。他们都爱吃!
开心果豆腐芝士蛋糕


Pistachio Tofu Cheesecake
Ingredients 材料 (A)
80g Pistachio Nuts 开心果
10g Rice Flour 粘米粉
15g Dried Cranberries 蔓越莓干
(B)
200g Firm Tofu 豆腐, cubed 切丁
200g Cream Cheese 奶油乳酪, cubed 切丁
115ml Fresh Milk 鲜奶
4 Egg Yolks 蛋黄
2 Tbsp Apple Cider Vinegar 苹果醋
1 Tsp Vanilla Extract 香草精
55g Plain Flour (sifted) 过筛的面粉
(C)
4 Egg Whites 蛋白
140g Castor Sugar 幼糖
Method 做法
Preheat oven to 170C degrees.
烤箱预热至170C度。
烤箱预热至170C度。
Line an 8-9" fixed based square cake pan with parchment paper or heavy duty aluminum foil with 1-2 inch overhang over the sides (as per picture).
在一个四方固底的蛋糕模里铺上锡纸,将锡纸的长度约比蛋糕模稍微长出1-2寸(依照图片)。
在一个四方固底的蛋糕模里铺上锡纸,将锡纸的长度约比蛋糕模稍微长出1-2寸(依照图片)。
In a food processor grind (A) pistachio nuts, cranberries with rice flour until fine crumbs.
把开心果,蔓越莓干及粘米粉A放入搅拌机捣搅成细屑。

Add ingredients (B) in sequence and continue blending until combined.
将材料B跟着依照次序放入搅拌机,并继续共混直至均合。

Add ingredients (B) in sequence and continue blending until combined.
将材料B跟着依照次序放入搅拌机,并继续共混直至均合。
In another dry and grease free mixing bowl, beat the egg whites until frothy. Add in castor sugar and continue beating until soft peaks stage.
准备另一个干净即无油的搅拌盆里把蛋白用打蛋器打出一些泡沫,然后加入幼糖打成尾端弯曲的蛋白霜(湿性发泡)。
准备另一个干净即无油的搅拌盆里把蛋白用打蛋器打出一些泡沫,然后加入幼糖打成尾端弯曲的蛋白霜(湿性发泡)。

Transfer 1/3 of the beaten egg whites into the (A) & (B) mixture and use a hand whisk to gently combine. Fold in the balance meringue to the batter with a spatula until incorporated.
挖1/3份量的蛋白霜混入乳酪A和B面糊中,用打蛋器轻轻混匀后再以橡皮刮刀沿着盆边以翻拌的方式将其余的蛋白霜搅拌均匀。
挖1/3份量的蛋白霜混入乳酪A和B面糊中,用打蛋器轻轻混匀后再以橡皮刮刀沿着盆边以翻拌的方式将其余的蛋白霜搅拌均匀。
Transfer the cake batter into the prepared cake pan. Steam bake at the lower rack of the oven at 170C degrees for 50 mins.
将搅拌好的面糊倒入蛋糕烤模中,放入已预热170C度而又倒满热水的烤箱的中下层烘烤50分钟。
将搅拌好的面糊倒入蛋糕烤模中,放入已预热170C度而又倒满热水的烤箱的中下层烘烤50分钟。

Allow cheesecake to cool at room temperature. Unmould cake and refrigerate until ready to serve. Best eaten chilled.
蛋糕烤好后取出(还不要脱模),等完全凉透后,放入冷箱冷藏数小时才享用。
蛋糕烤好后取出(还不要脱模),等完全凉透后,放入冷箱冷藏数小时才享用。


No comments :
Post a Comment