Tuesday, July 14, 2015

芋头布丁 Taro Pudding

Are you a fan of yam / taro? 

你爱吃芋头吗?


This is a great recipe taken from the book 'Delicious Nyonya Kueh & Desserts' by Patricia Lee. We all love this kueh pudding and its vegan too! To me, this dessert is truly soft with smooth texture like pudding despite its preparation and cooking method more attuned towards steam cakes. Yummy!  


这是一个非常可口的糕点食谱,取自于Patricia Lee的‘娘惹粿风味糕点’食谱书里。虽然煮法跟蒸粿相似,制作出来的糕点却是如其名般, 就如布丁一样柔软与光滑。此外,又是全素无加奶蛋素,对素食主义的我是最好的消息。赞!
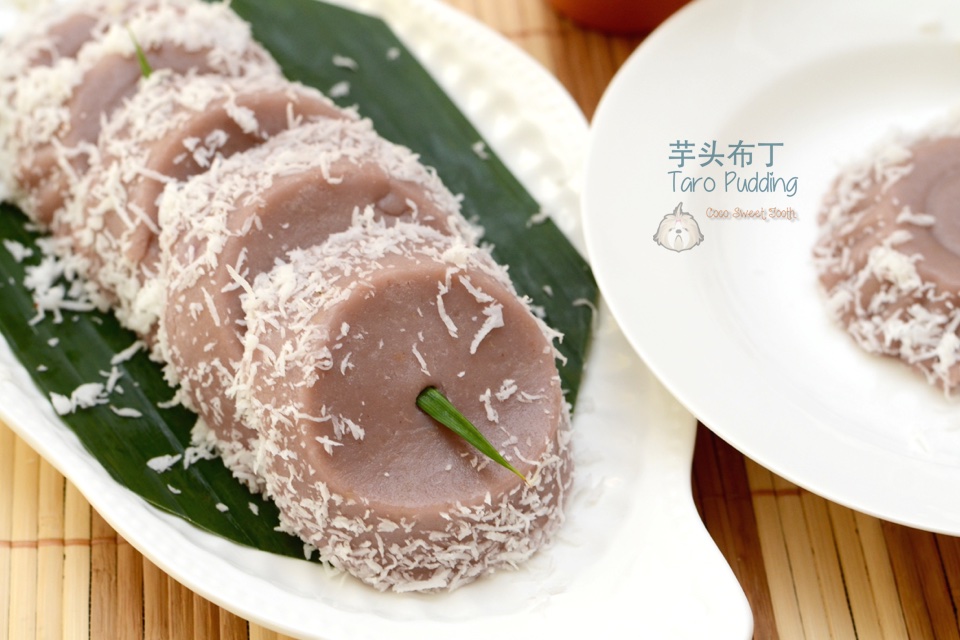


芋头布丁
Taro Pudding 

Ingredients 材料

550g Taro / Yam 芋头
350ml Thick Coconut Milk 浓椰浆
100ml Pandan Water 班兰水
110g Sugar 砂糖
85g Rice Flour 粘米粉
85g Tapioca Flour 木薯粉
a pinch of salt 盐少许
200g Grated White Coconut 白椰茸
6 Pandan Leaves 班兰叶
2-3 Drops Purple Food Colouring 紫色食用色素2-3滴


Directions 做法

Combine grated coconut,3 pcs of pandan leaves and salt evenly and steam for 7-10 mins. Leave to cool.
椰茸, 三片班兰叶及盐拌匀, 蒸7至10分钟. 待凉.

Boil 150ml of water with 3 pandan leaves for 10 minutes to get 100ml of pandan water. Set Aside. 
将150ml的开水和3片班兰叶一起烧煮10分钟,取出100ml班兰水。搁置。

Cut taro into small pieces and boil in a pot with sufficient over the taro for 20 mins or until until soft.
芋头切成小块, 泡入乘满足够清水的锅里煮20分钟直到芋头煮软熟透为止。

While waiting for the taro to be cooked, combine coconut milk, pandan water, sugar, rice flour and tapioca flour into a mixing bowl and stir until well combined.
当还在等待芋头正在锅里烹煮时,把浓椰浆,班兰水,砂糖,粘米粉和木薯粉混合到另一个碗中。搅拌直到充分结合即可。

Drain the cooked taro. Transfer taro into a blender, add in half of the coconut milk flour mixture, purple food coloring and blend together with  the taro until blended. If your blender is huge enough, you may add in the balance of the coconut flour mixture into the taro mixture and blend into a smooth paste. Otherwise, you may transfer the blended taro into the balance coconut flour mixture and mix evenly. 
沥干熟芋头。把芋头放入搅拌机,加入一半的椰浆兰水面粉混合浆和紫色食用色素,并与芋头一起搅拌直到均匀混合在一起。若是你的搅拌机容纳量大的话,你可以把剩余的椰浆兰水面粉混合浆加入搅拌机一起搅拌混合成均匀的糊状。若不的话,你也可以把芋头椰浆糊转移出搅拌机放入剩余的椰浆班兰粉糊混合搅拌均匀。

Pour batter into muffin cups and steam the batter for 25-30 mins. Leave to cool.
把芋头糊倒入松饼杯或模具内,蒸25-30分钟。待凉。

Unmould taro pudding onto the grated coconut and coat liberally before serving.
将芋头布丁倒出模,撒上椰茸才享用。


Do link back to Coco Sweet Tooth if you have used any information as published in this blog.

This post is linked to Cook Your Books Event #25hosted by Joyce of Kitchen Flavours

Monday, July 13, 2015

酪梨面包 Avocado Bread

I remembered reading from somewhere that using avocados can be used as an alternative to making lighter version of brioche bread with minimal use of butter.


我记得成经在某个网络阅读过有关採用酪梨制造出无奶油的Brioche皮欧许法国奶油面包. 


Avocados are in season here and I ended up buying some without knowing what to do with it. Actually, I am not a fan or avocado. Never was and still am. But since people around me often cited the benefits of this fruit I decided to give it a try. Not directly consuming it, but more of using it for baking.

正好现在是酪梨果大量售卖季节而我又好奇的买了4粒想用来加入面包或蛋糕食谱配方,顺便了解一下为什么身边的多位朋友亲属们如此热爱这类果子。


This wonderful recipe was adapted from Carol Hu's The Second Book of Baking for Beginners by Carol Hu 胡涓涓. I am submitting this to Cook Your Books #25 hosted by Joyce of Kitchen Flavors.

这个面包配方取自于胡涓涓的烘焙新手必备的第二本书加以修改少许配料制成. 


酪梨面包
Avocado Bread


Ingredients 材料(A)


200g Avocado 酪梨果肉, cubed 切成小丁
500g Bread Flour 高筋面粉
80g Whole Meal Flour 全麦面粉
1-1/2 Tsp Instant Dry Yeast 速发干酵母
1/4 Tsp Salt 盐 

45g Castor Sugar 细砂糖
60g Corn Oil 玉米油
175g Plain Yoghurt 原味酸乳
1 Egg 鸡蛋

Topping 表面装饰(B)


Egg Wash 全蛋液
Almond Slices 杏仁片


Directions 做法


Dice the ripened avocado fruit into cubes. Combine all ingredients (A) into the bowl of a stand mixer with dough hook and mix with lower speed until all ingredients are well combined.

酪梨果肉取200g切成小丁. 将所有材料A倒入搅拌器的钢盆中搅拌搓揉成为一个不粘手的面团。


Increase the mixer speed to medium and continue kneading for approx 15-18 mins, until the dough becomes elastic to achieve the window pane test.
以照揉面标准程序继续搅拌搓揉直到成为撑得起薄膜的面团。


Transfer the dough to a slightly greased bowl, spray the top of the dough with water and cover bowl with cling wrap. Allow the dough to proof for an hour or until the dough doubled in size.
将搓好的面团滚圆,收口朝下捏紧放入涂抹少许油的盆中。在面团表面喷一些水,盖上保鲜膜放置到温暧密闭的空间发酵约60分钟或至面团发成两倍大即可。


Dust worktop with some bread flour, transfer dough from bowl onto table top, punch down the dough to release air. Divide dough into 4 equal portions and mould it round. Allow the dough to rest for another 15 mins before shaping.桌上洒些高筋面粉,将发酵好的面团取出,把面团空气拍出,平均分割成4等分,然后滚成圆形,盖上保鲜膜再让面团休息15分钟。


Sprinkle some bread flour on the dough, use both palms to roll out each dough on the tabletop to form a 30cm length dough strips. Take 2 strips of dough and form a braid by criss crossing alternatively. Pinch the ends and tuck the seals down.
休息好的面团表面洒些手粉必免沾粘,用手搓成约30cm的长条面团。将两条面团交叉缠绕成麻花状,两端捏紧。


Transfer the 2 sets of braided dough into 2 nos of slightly greased bread pan of size 24x13x6.5cmD.
将卷好的面团放入2个刷上不融化奶油的24x13x6.5cm深的土司烤模里。


Spray some water over the loaf with a fine mist nozzle. Final proof the loaf in a unheated oven for another 50-60 mins.
在面团表面喷一些水,把土司烤模放入未开火未预热的烤箱里再发酵50-60分钟至面团发成两倍大。


When the dough has achieved 90% proofing (10% almost reaching the brim of the baking mould), remove baking pan from the oven. Preheat oven to 170C degrees.
面团发酵到九分满时,把土司烤模取出烤箱,将烤箱打开预热至170℃。


Apply a thin layer of egg wash over the top of the dough, scatter almond slices over the top. Bake in a preheated oven at 170C degrees for 38-40 mins.进烤箱前在面团表面轻轻刷上一层全蛋液,把杏仁片铺在面团表层,放入已预热到170℃的烤箱中烘烤38-40分钟。


Remove bread from oven and turn it out onto cooling rack to cool.
烤好后马上倒扣出来放在铁网架上放凉。


Do link back to Coco Sweet Tooth if you have used any information as published in this blog.

This post is linked to Cook Your Books Event #25hosted by Joyce of Kitchen Flavours


Sunday, July 12, 2015

天使蛋糕 Angel Food Cake

Angel Food Cake is a very light weight white sponge cake made with beaten egg whites and  no butter. This cake never reside within my baking radar until I was left with 5 cups of leftover egg whites from my making of the Indonesia traditional layered cake. 
天使蛋糕是一种轻盈,无奶油又低脂的白色海绵蛋糕。这类蛋糕主材料是以打至干性发泡的蛋白与面粉混合制成。虽然知道有关这项蛋糕,长久以来都没有想尝试的念头一直到冰箱里剩余一堆因制作传统印尼千层蛋糕所余留的蛋清(蛋白)后用上这个食谱。

To clear off some of the leftover egg whites, I took the recipe from  Minty's Kitchen's blog and integrate with another recipe book to bake this cake.
为了清除剩余的蛋清/白,我把Minty's Kitchen的蛋糕配方和另一本食谱里的天使蛋糕屏合起来,再加以修改烘焙出自己喜爱的口味。


The end result came out as goods as what was illustrated in  Minty's Kitchen recipe. The cake is so fluffy and light with finer texture, almost close to that of ogura chiffon cake. To add more zest to this minimal ingredient cake, I intentionally added in lime juice and finely chopped dried apricot to enhance the cake's aroma.
制成出的蛋糕效果就如Minty's Kitchen里所描述般的蓬松细密蛋糕体,有如相思蛋糕与戚风蛋糕的结合体。我还刻意在这蛋糕配方里加入柠檬汁和切碎的干杏果,以提升蛋糕香味。

For a finer textured cake, I sifted the flour, icing sugar and castor sugar three times to loosen the dry mixture before folding into the egg batter.  Apart from dried apricot, you could also try using chocolate chips to create a totally different kind of flavor. The important part here is to chop whatever 'additional fillings' into very small pieces so that it would be feather light and thus not sink into the bottom of the cake batter. Lastly, fold in the flour sugar and chopped apricot as carefully as possible. Do not overfold to avoid deflating the cake batter.
跟据食谱所述,若想制造出细嫩的蛋糕,就必须把混合好的面粉,糖粉幼糖一起过筛三次或以上才能加入蛋清糊。你若不喜好干杏果的话,也可尝试加入切碎的巧克力制作出另一番风味。在这项里最须留意的是要把馅料”成非常小的碎块,以防馅料全沉淀于蛋糕底而不均匀。 最后,将混合过筛好的面粉和糖用橡皮刮刀轻轻翻拌,尽可不要翻拌过度以免蛋白消泡。


天使蛋糕
Angel Food Cake


Ingredients 材料(A)
185g Self Raising Flour 自发面粉
50g Icing Sugar 糖粉
100g Castor Sugar 幼糖

材料(B)
2-1/4 Cups Egg Whites 蛋清/蛋白
1-1/2 Tsp Cream of Tartar 塔塔粉
1/2 Tsp Salt 盐
80g Castor Sugar 幼糖
3 Tbsp Fresh Lime Juice 新鲜柠檬汁
3 Tsp Vanilla Extract 香草精
30g Dried Apricot, finely chopped 切碎干杏果


Directions 做法

Preheat oven to 170C degrees.
将烤箱预热至170℃度。

In a large bowl, sift together ingredients (A) 100g castor sugar, 50g icing sugar and flour three times. Set Aside.
在一个大碗盆里将所有材料A的自发面粉,糖粉和幼糖一起混合后过筛三次。搁置。


In a dry and grease free bowl, whip egg whites (B) until foamy. Add cream of tartar, lime juice and salt. Continue whipping until soft peak stage while spooning in the 80g castor sugar gradually and keep whipping the egg white mixture until it achieved glossy stiff peaks. Add vanilla extract.
把蛋清倒入进一个干洁无油脂的搅拌盆里,将蛋B清打至发泡。加入塔塔粉,柠檬汁,盐之后继续拌打至湿性发泡,用汤匙轻轻地把剩余80克幼糖混入蛋糊。继续拌打一直达到干性发泡成度后才加入香草精。

Gradually sprinkle in the chopped apricot before spooning in the flour mixture and fold gently. Do not overfold or the batter might deflate.
以轻盈动作把干杏果碎撒在蛋糊中,再用汤匙将过筛面粉糖粉加入,用橡皮刮刀轻轻翻拌,尽可不要翻拌过度以免蛋白消泡。


Transfer the batter into a 24cm tube baking pan. Bake the cake in middle lower tray of the preheated oven at 170C degrees for 45mins. I lowered mine to 160C degrees during the last 15mins of baking time as my oven temperature was probably too hot and the top has started to crack. 
把蛋糕糊倒入一个24厘米中空烟囱烤模,放入预热至170℃度的烤箱中下层烘烤45分钟。由于不同烤箱的温调有异所以还是建议你自己加以调整。我的烤箱偏热,所以实际烘烤时间是以170℃度烘烤30分钟,之后调低于160℃烘烤15分钟直到熟透为止。


Invert the cake pan on a cooling rack as soon as it is out from the oven.  
蛋糕烤好后马上将烤盘倒扣在冷却架上。


Remove the cake pan once the cake has completely cooled.
等到蛋糕冷却后才脱模。


Saturday, July 11, 2015

传统印尼木薯椰丝蒸糕 Kue Ketimus ......Traditional Indonesian Tapioca Coconut Steamed Cake

My maid taught me this yummy and super easy 5 ingredients coconut and tapioca steam cake yesterday and the texture of the cake taste like steamed glutinous rice dumpling, but with minimal preparation and cooking time.
这是一道我家印尼女庸与我分享的美味可口即容易制作的下午茶甜点。这甜点的实际中文名称我不是很清楚因为所以便从所用的原料中自创个名称。这甜品只运用4种材料,準备方法过程简易而成功例是百分之百。蒸出来的糕点吃起来的口感有如吃粽子里的糯米一样,正合我好。

As compared to many other steam kuehs, this is certainly a simple and not so messy tea time dessert to make. To me, the best part is this recipe is totally vegan and I actually ate almost half of the entire lot.
若跟制作其他蒸糕甜粿相比,我最满意的就是那简单而干净利落的过程,再加上材料全都是素料,我啊真的吃了不少。

Have a great weekend and may you have as much fun as I did spending time with my beloved partner and fur babies. 
祝大家有个愉快的周末,跟喜爱的亲友或家人一起度过,把时间填满做自己喜好的活动。


传统印尼木薯椰丝蒸糕
Kue Ketimus (Traditional Indonesian Tapioca Coconut Steamed Cake)

Ingredients 材料
840g Grated Tapioca 木薯丝

325g Freshly Grated Coconut 新鲜椰丝
150g Gula Aren / Gula Melaka 红糖切碎
1/2 Tsp Salt 盐

Banana Leaves 芭蕉叶 (For Wrapping)

Directions

Prepare 14 pcs of banana leaves cut to 9x18cm size. Set aside.
准备14片切 成 9x18cm 大小的芭蕉叶。搁置。

Combine all ingredients into a mixing bowl until evenly mixed.
将所有材料放入搅拌碗,混合直到均匀为止。

Scoop 2 Tbsp of the tapioca coconut mixture onto the centre of banana leaf. Fold into a rectangular shape with both ends tucking down.
舀2汤匙木薯椰子混合馅放到香蕉叶中。折叠成矩形的形状,两端集圈向下。

Repeat the same for the balance mixture and steam the wrapped mixture under medium high heat for 30 minutes.
重复同样的过程一直到全部的木薯椰丝内馅都用完为止。 将芭蕉叶包好的木薯椰丝糕以中火蒸30分钟即熟。


Friday, July 10, 2015

芋泥地瓜年糕球 Sweet Potato Yam Nian Gao Balls


Nian Gao, also known as Chinese New Year's cake or New Year Sticky Cake, is prepared from glutinous rice and widely sold prior to the celebration of the Chinese Lunar New Year festival. Today, I am sharing this recipe with ready made Nian Gao which I overlooked using as it was a gift we received from someone during that time. 


我和丈夫特别爱吃炸年糕,恰好上个星期在家找到一个被遗忘了的年糕。幸好还没变质所以便在Jane's Corner 里找到这个非常易做的食谱。

If you are keen to try out this recipe but have no access to it, you could try making your own from Nasi Lemak Lover's recipe. Alternatively, you could also use their forms of preferred fillings easily available in your area. With or without, I still think the deep fried sweet potatoes and yam itself is good enough for my consumption. 

如果您有兴趣尝试制作这个食谱而又买不到年糕的话,你可从Nasi Lemak Lover 的博客里找到食谱自己尝试做。此外,你也可以加如其他喜好的内馅或者不加而存脆以芋头地瓜泥为主,对我来说都是很可口。

芋泥地瓜年糕球 
Sweet Potato Yam Nian Gao Balls
Recipe adapted from Jane's Corner

Ingredients 材料
250g Yam 芋泥, boiled and mashed
300g Sweet Potatoes 地瓜泥, boiled and mashed
125g Plain Flour 普通面粉
1-1/2 Tbsp Rice Flour 粘米粉
2 Tbsp Sugar 糖
1 Tsp Salt 盐
1/2 Tsp Eno 以囉果子盐 (Optional)

(Filling) 内馅
350g Nian Gao 年糕切丁, Cut into small cubes
or
Red Bean Paste 红豆沙 (store bought 现成包装的)


Directions

Combine boiled yam and sweet potatoes and mashed until evenly combined.
把煮软的芋头(山药)和地瓜一起加入大碗内均匀混合捣碎成泥。


Add in flour, rice flour, sugar, salt and eno (if using) and knead to form a smooth dough.
再加入粘米粉,糖,盐和以囉果子盐(勿必用),揉搓成一个滑面团。

Divide dough into 14g balls. Flatten the dough and place in the nian gao filling and shaped into a ball. Repeat the process until it is all used up.
将面团分割成14克小面团。把面团压扁成圆形,在面皮中间放入年糕内馅,面皮周围收口捏成为一个圆形。重复这个过程,直到全部面团用完为至。


In a deep frying pan or wok, heat up sufficient oil and deep fry the nian gao balls in medium heat oil until golden brown.
把足够的食油倒入油炸锅或炒锅里,等到食油沸热后便把年糕面团以中火油炸至金黄色即可。


Thursday, July 9, 2015

传统印尼千层蛋糕 Traditional Indonesian Layer Cake

Bought a book during my recent trip back from Malaysia on the making of various types of layer cakes. The title of the book "Layer Cakes : Baking With Love" by Evon Kow hold a wide collection of layer cakes recipes from French Mille Crepes, Indonesian Layer Cakes, Layered Kuihs, Pastries and many other types of desserts.

我上两个月前回马来西亚时购买了一本烘焙食谱里面所记载的全是有关不同千层糕和蛋糕类的甜品点心。这本书的标题是"千层蛋糕 : 铺陈幸福的感觉" ,作者是高月云。书里面有记载着法国米勒煎饼蛋糕,印尼千层蛋糕,蒸分层粿,糕点等多种类型的甜点蛋糕层收集的食谱。

I had wanted to try making this cake for some time as I find it a real test towards my patience, taking hours to complete layers by layers. And so I did.

我本想尝试制作这个蛋糕有一段时间了,因为要花上数小时一层一层的慢慢烧烤对我来说真是一个耐心考验。最后,我还是屈服了自己硬着头皮下手做了。

As I was not familiar with using grill mode with the oven, I wasn't patient in waiting for each layer to set completely before creating another. I ended with an overly compact layered cake. Lesson learnt from this experience....... patience patience and more patience.

由于我不熟悉使用烧烤模式的烤箱,我没有认真和耐心等待每一层定型就速速加上另一层。结果这原本应该鹏涨多层的蛋糕却被我缩扁过于结实了。从这个经验所学到的教训.......耐心,耐心,再多耐心。


传统印尼千层蛋糕 
Traditional Indonesian Layer Cake

Ingredients 材料 (A)
400g Whole Eggs 全蛋
500g Egg Yolks 蛋黄
300g Castor Sugar 幼糖
2 Tbsp Ovalette 乳化剂

Ingredients 材料(B)
200g Self Raising Flour 自发面粉

2 Tsp Mixed Spice 混合辛香科

Ingredients材料 (C)
500g Butter 有盐室温软化奶油, soften at room temp
4 Tbsp Condensed Milk 炼奶


Directions

Preheat oven to 200C degrees. 
把烤箱预热至200℃度.

Grease and line a 22x22x7cmD square baking pan and heat the pan for 2 mins prior to baking. 
取一个22x22x7cmD四方蛋糕模,抹油后垫上烘焙纸,放入预热烤箱内烤热2分钟。

Combine ingredients (C) in a mixing bowl and cream the butter until fluffy. Set aside.
将材料(C)的软化奶油和炼奶放入搅拌碗内,打发至松发。搁置备用。

In the bowl of a stand mixer with whisk attachment, beat all ingredients (A) until thick and fluffy.  
再将材料(A)的所有原料混入另一个搅拌器的碗中,以打蛋器配件用高速度搅拌至浓稠和松发。 

In a separate bowl, combine sifted flour and mixed spice. Gently add the sifted dry ingredients into the egg mixture (A) and continue whisking on medium low speed until well combined.
把材料(B)过筛好的自发面粉和混合辛香料混入另一个碗, 轻轻地倒入鸡蛋糊(A)内, 继续搅拌至均匀。

Lastly mix in the butter mixture on low speed in 3 batches. Beat well after each addition.
把打发的奶油分三次加入蛋糕糊,以低速拌匀。

Place the empty baking pan into the preheated oven for 2 minutes. 
将烤模放入预热烤箱烤热2分钟。

Set the oven to grill mode. Spread 3-4 Tablespoons of batter evenly into the bottom of the baking pan.
把烤箱转去烧烤模式。均匀倒入3至4大汤匙面糊进烤模底。 

Tilt the cake pan around to evenly coat the base of the pan. Use the back of the spoon to level the surface. Grill each layer until it has cooked and browned.
倾斜蛋糕盤把面糊均匀塗步蛋糕模底。使用汤匙的背面将面糊抹匀放入烤箱,烤至熟和转褐。

Continue to spread 3-4 tablespoons of cake batter evenly by tilting the pan. Its like frying an omelette evenly on the frying pan. Repeat the steps until the batter is all used up.
继续舀入3-4打汤匙面糊,依序烤完所有面糊即可。

Set the oven to 180C degrees (Upper and lower heat) and bake the cake for another 10 minutes before  removing the cake from oven.
最后一层将烤炉改调至180℃度(上下火)烘烤10分钟取出。


Tips 技巧:

Always keep the cake surface 7-8 inches away from the grill. Adjust level of oven rack when necessary.
将蛋糕模放入烤炉的中下格。确保蛋糕表层离导热管约7-8寸. 可自行调节烘烤架的高低度。

Cover the top with aluminum foil if the cake surface browns too early during the last 10mins of baking.
在最后10分钟时间内,若蛋糕表层上色过快,可盖上一张锡箔纸以防烤焦。


Do link back to Coco Sweet Tooth if you have used any information as published in this blog.

This post is linked to Cook Your Books Event #25hosted by Joyce of Kitchen Flavours

Printfriendly

Related Posts Plugin for WordPress, Blogger...