Tuesday, April 21, 2015

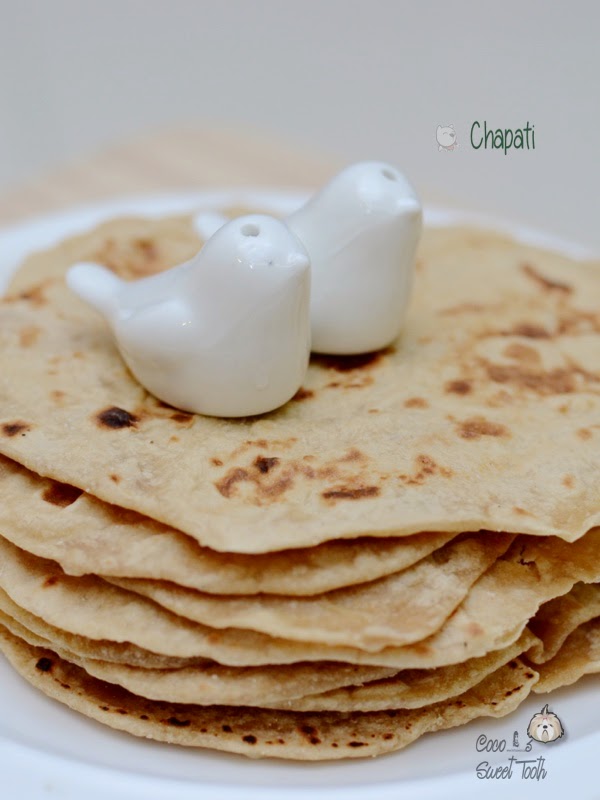
Chapati ........my vegetarian dhal companion


Chapati, also known as Indian flat bread, is our very first Indian pancake attempt prior to the making of  Pita Bread last month. It all started with my cravings for curry lentils (dhal) as well as my maid's sudden urge to eat roti canai. Hence, I googled the net for the easiest recipe to create something equivalent instead of roti canai to go along with the batch of vegetarian curry lentils (Dhal) dhal / lentils sitting around in the fridge.


It's a very simple and straight forward recipe with minimal ingredients.  


Chapati 

2 Cups of Atta Flour
3/4 Cups Water
a Pinch of Salt


Directions 
  • Mix Atta Flour with a pinch of salt. Gently add in the water to the flour mixture, adjusting and adding as needed until the mixture forms a dough. 
  • Continue kneading until the dough is manageably soft and smooth. 
  • Cover the dough and set to rest for 15 mins.
  • Dust work space with flour. Divide the dough into equal portions each equivalent to a lemon size dough.  
  • Take each dough and roll between the palms with gentle pressure in circular motion until the dough is smooth and without cracks.  
  • Repeat the same for the remaining lemon size doughs. 
  • Lightly coat each dough with Atta flour. Using a roll pin, flatten and roll out each dough to form a 4' - 6' flat disc.  The rolled out Chapati must not be less than 1/6" thick regardless of the disc size.
  • Place the dough / disc on a heated pan on medium flame. Using a spatula, flip the chapati when raised bumps appears on the surface. Repeat the same for the other side until chapati is thoroughly cooked.
  • Serve with Curry Dhal or any gravy of your preference.


Chocolate Marble Swirl Bread 大理石面包


Being an avid baker, I landed up with lots of leftover ingredients in the freezer and sometimes I often forgotten about it until I started clearing stuffs to make way for newer leftovers such as cake frosting, cake toppings, bread fillings and many more I couldn't recall.

Anyway, last month I deliberately increase the quantity of the required cream cheese toppings ingredients while making a batch of strawberry cream cheese bread hoping to keep the leftovers as toppings to enhance a 2 tone / flavor bread recipe I have in mind. 


This recipe is an adaptation of several bread recipes whereby I took bits and pieces of certain information from various bread books hoping to create a different outlook cum tasty bread. The bread turns out soft and tasty as I hoped.  Do feel free to try making on your own and email me the outcome. Happy baking!


Chocolate Marble Swirl Bread

Sweet Bread Dough 基本麵团甜麵包
200g Milk
4g Instant Yeast
330g High Protein Bread Flour
70g Low Protein Flour
80g Castor Sugar
4g Salt
1/2 Tbsp Apple Cider Vinegar
1 Grade A Egg
40g Unsalted Butter
2 Tbsp Unsweetened Dark Cocoa Powder


Cream Cheese Toppings (A)
125g Cream Cheese
40g Sugar
50g Whipping Cream
10g Instant Custard Powder

Chocolate Rice for decoration (B)

Method (A) 
Cream the cream cheese until light. Add sugar and continue creaming until smooth. Add in whipping cream and mix until well blended. Add in custard powder and mix until well combined. Transfer batter into a piping bag and set aside. 


Directions
  • In a stand mixer fitted with a dough hook attachment, add all the ingredients except butter. However, leave around 30g of milk left to be added slowly later. 
  • Mix at low speed (speed 1) until all the ingredients are well mixed to form a coarse ball dough ( appro. 2-3 min). Add the remaining liquids if necessary.
  • Add butter and slowly increase the speed to medium for approx. 15-18 min until a smooth, window pane effect is formed. 
  • Divide the dough into two equal portions. One portion to remain as it is and the other portion to mix with 2 Tbsp of unsweetened dark cocoa powder and knead until fully combined to form a chocolate color dough. 
  • Shape the 2 doughs into a ball and allow it to proof in individual (lightly greased) bowls. Cover the bowls with cling film and allow to proof for 1 hour or until it doubles in size.
  • Test the readiness of the dough with a finger lightly dusted with low-gluten or cake flour.  The dough is ready when the dough remain indented after the finger pokes into it.
  • Punch down the doughs. Roll into balls and leave to rest for another 15 mins.
  • Lightly dust the work top with low protein flour, using a rolling pin, roll out the light color dough into a 10x14cm rectangle and set aside. 
  • Repeat the same for the chocolate dough and roll out the dough into the same rectangular dimension as per the light color dough of 10x14cm. 
  • Stack the chocolate colored rectangular roll dough on top of the light color dough.  Flatten the joint dough sheet with the rolling pin. 
  • Roll up the rectangular sheet dough like a roulade and place in a well greased bread loaf pan. Tuck the ends down. 
  • Spray some water over the dough with a fine-mist nozzle. Proof the final bread dough in the tin for 50 min until it almost reaches the brim of the tin. 
  • Pipe cream cheese batter over the top of the bread dough. Sprinkle and decorate with some chocolate rice.
  • Preheat oven to 200 degC but bake at 180 degC for about 35 - 40 minutes. Remove from oven and unmould immediately. Let the loaf cool off before slicing.

Sunday, April 19, 2015

Pandan Chiffon Cake....... simple yet unresistable


It's been almost 3 years since I embarked on this wonderful and fulfilling journey of baking and photography. Looking back I still find it hard to believe how did I stay onto this hobby until today without wavering. 

For all that has been achieved, I must give all credits to my husband who has been my ever supportive food sampler. Not only did he not complain having to eat the same batch of bakes for several days in order to finish the entire lot since the entire household only consist of 3 persons, hubby, me and the maid. So the most badly ones are my hubby and maid since I hardly touch (eat) my bakes, as I would normally be worn out by the end of the day baking with bread kneading, cake baking and photography.

This recipe and photograph was one of my earlier batch of baking works. I don't quite remember where did I get the recipe from but somehow it was posted on my Facebook among the thousands of photos I stored there. 

This is a relatively simple and straight forward chiffon cake recipe yielding good outcome. Feel free to try out.

   
Pandan Chiffon Cake
Ingredients:

5 Grade A Eggs (Separated)
100g Castor 
60g Corn oil
1/2 Tsp vanilla extract
90g Cake flour
20g Corn flour
1/4 Tsp baking powder
1/2 Tsp salt
2 Tbsp Pandan leave juice
1 Tsp green food colouring (Optional)
60ml Thick coconut milk


Method: 
  • Separate Egg Yolks and Whites. Sift Cake flour, cornflour and baking powder together. Mix Pandan leave juice, thick coconut milk and green food colouring together.
  • Add 1/2 of the sugar to the egg yolks and beat till creamy and fluffy. Add in 1/3 of the coconut milk mixture and mix well. Add in 1/3 of flour mixture.
  • Continue with another 1/3 of the coconut milk and 1/3 of the flour mixture. Repeat until coconut and flour are used up. Add in salt, vanilla extract and corn oil and gently mix well.
  • In a separate (Clean, dry and oil free) bowl, beat egg whites till foamy. Add in remaining sugar and continue to beat till firm peaks are formed.
  • Take 1/3 of the egg white and add to the batter. Gently fold in to mix well. Add remaining egg whites to the batter and continue to fold in to mix well.
  • Pour batter into chiffon cake mould. Gently knock the sides of the mould to release air bubbles.
  • Bake in preheated oven at 160degrees C for about 60mins. Remove from oven, invert the mould and set aside to cool for 30 mins.

Saturday, April 18, 2015

Green Tea Cheddar Cheese Cake, with a touch of green


Last month I came across an old recipe for Parmesan Cheese Cake from dailydelicious, I started adapting the recipe based on what ingredients I have at hand and ended with a slightly different cheese cake. Nevertheless, I am rather happy with the outcome.


As you can see from the little amount of cheese used, this cake is not as rich but rather more towards the souffle cheesecake texture. As compared to using crushed biscuits as the cake base, I would rather take the trouble making a layer of sponge cake for the ease of handling upon slicing. Also, there is the versatility of choosing the preferred one's preferred flavor and color to enhance the taste of the cake. 


Sponge cake (Cheese Cake Base)

3 Grade A Eggs
80g Castor Sugar
90g Cake Flour
2 tsp Green Tea Powder
30g Unsalted Butter, melted


  • Preheat the oven to 180C degrees.
  • Line a 25x25cm square baking pan with baking paper.
  • Mix and sift the flour together with the green tea powder. Set aside.
  • In a heat proof mixing bowl, whisk the eggs with the sugar over hot water until warm and the sugar melted.


  • Remove mixing bowl from the hot water and continue whisking with a hand mixer until thick and lighten in color and upon lifting the mixer the batter hold the trail for several seconds.
  • Sprinkle the flour mixture over the egg batter and fold to combine with a spatula.
  • Pour melted butter over the batter and gently fold until combined.
  • Pour batter into the pan and bake the cake for 20 mins.
  • Allow the cake to cool in the pan before trimming the cake to fit as the base for the cheese cake.


Making the Cheese Cake
( Sufficient for a 21x21cm square cake pan)

80g Cream Cheese
80g Butter
50g Cheddar Cheese
1 tsp Vanilla Extract / Paste
200ml UHT Fresh Milk

30g Raisins (filling)

70g Cake Flour, sifted
25g Sugar

80g Egg Yolks
50g Plain Yoghurt + 1 Tbsp Fresh Lime Juice

180g Egg Whites
70g Sugar

Mixed Fruit / Apricot jam  for brushing top of cake


Directions :


  • Preheat oven to 180C degrees. Line the bottom and the sides of a 21x21cm square cake pan with parchment paper ( I use aluminum paper). I also add another layer of aluminum paper over the cake pan to prevent water from seeping into the cake while baking in waterbath.
  • Place the sponge cake layer into the cake pan and sprinkle the raisins over the sponge cake.
  • Mix cake flour and sugar together. Set aside.
  • Mix 1 Tbsp of fresh lime juice into the yoghurt.  Set aside.
  • In a saucepan, melt the cream cheese, butter, cheddar cheese together with milk and cook over low heat. Add vanilla extract.


  • Pour the above mixture into the flour mixture and whisk to combine. Add egg yolks and continue stirring until smooth. Add in yoghurt mixture and continue stirring until thoroughly combined.
  • In another clean and oil free mixing bowl, beat the egg whites with sugar until soft peaks form. Fold the meringue into the egg yolk in 3 additions, fold to combine. 
  • Pour batter into the prepared pan.


  • Place the cake pan over the baking pan. Pour hot water into the baking pan until it reaches 3/4 of the cake pan.
  • Bake at 180C degrees for 30 minutes. Lower the temperature to 160C degrees and continue baking for another 25-30 minutes. Half way through the baking, cover the cake top with aluminum foil from over browning.
  • Remove cake from oven and let cool.
  • Once the cake has cooled, brush the top with mixed fruit jam. 


Wednesday, April 15, 2015

Strawberry Cheese Bread

We were back in Malaysia for an entire week during the first week of April for 清明节 and 观音诞 celebrations. It was an extremely tiring week for me  filled with lots of activities, traveling time from KL to Taiping Perak.


By the end of the trip I was extremely home sick. I missed my fur babies, the familiar scents of my bed and living space. Yesterday, I started going through the stacks of unpublished photographs and began working on the arrangement and typing out the recipes for this blog.  This is the second time I have revisited this recipe (previous batch using Alex Goh's version) with some adaptions. 


Sweet Bread Dough 基本麵团甜麵包 (A)
200g Milk
4g Instant Yeast
330g High Protein Bread Flour
70g Low Protein Flour
80g Castor Sugar
4g Salt
1/2 Tbsp Apple Cider Vinegar
1 Grade A Egg
40g Unsalted Butter
Strawberry Cream Cheese Toppings (B)
125g Cream Cheese
40g Sugar
50g Whipping Cream
10g Instant Custard Powder

Method (B) 
Cream the cream cheese until light. Add sugar and continue creaming until smooth. Add in whipping cream and mix until well blended. Add in custard powder and mix until well combined. Transfer batter into a piping bag and set aside. 


Streusel Topping (C)
40g Sugar
50g Unsalted Butter
100g Bread Flour

Method (C)
Mix Sugar and butter until crumbles by using fingers. Add in flour and continue to mix until crumbles. Store in the refrigerator for later use.


Directions
  • In a stand mixer fitted with a dough hook attachment, add all the ingredients except butter. However, leave around 30g of milk left to be added slowly later. 
  • Mix at low speed (speed 1) until all the ingredients are well mixed to form a coarse ball dough ( appro. 2-3 min). Add the remaining liquids if necessary.
  • Add butter and slowly increase the speed to medium for approx. 15-18 min until a smooth, window pane effect is formed. 
  • Shape the dough into a ball and allow it to proof in lightly greased bowls. Cover the bowl with cling film and allow to proof for 1 hour or until it doubles in size.
  • Test the readiness of the dough with a finger lightly dusted with low-gluten or cake flour.  The dough is ready when the dough remain indented after the finger pokes into it.
  • Punch down the dough. Roll into balls and leave to rest for another 15 mins.
Yummy.....
  • Divide sweet bread dough into 14 equal portions and mould it round. Place 6 doughs into a  well greased bread loaf pan. Repeat the same if you have an extra bread mould, otherwise, you may place the remaining bread doughs onto a baking tray.  
  • Spray some water over the dough with a fine-mist nozzle. Leave the dough in a warm place ( I kept mine inside the oven). Proof the final bread dough in the tin for 50 min.
  • Egg wash the surface. Pipe the strawberry cream cheese fillings in the centre of each individual bread. Sprinkle some streusels over the top.
  • Preheat oven to 200 degC but bake at 180 degC for about 35 - 40 minutes (for bread loaf) and 15 minutes (for individual / loose buns). Remove from oven and unmould immediately. Let the loaf cool off before slicing.


Wednesday, April 1, 2015

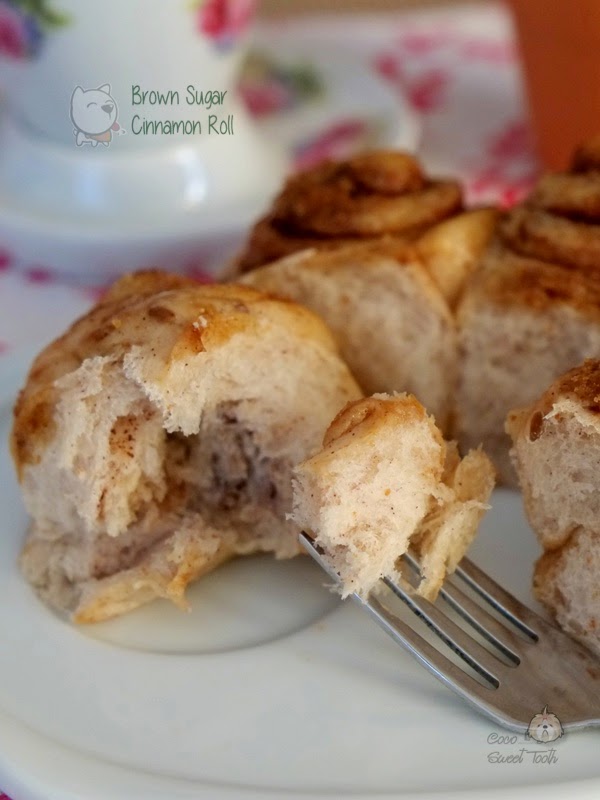
Brown Sugar Cinnamon Rolls

Brown Sugar Cinnamon Rolls

Carol Hu's "The Second Book of Baking for Beginners" was my first bread making and guide book when I first started exploring baking. The book had served me well as a self learner, providing me with a wealth of information with detailed written and pictorial instructions. Until today, I would still recommend this book to anyone who wish to pick up baking skills on their own. It is a must have starter book for beginners as the methods are very straight forward and recipes proven to yield good results.

Lately, I have been alternating between 周老师的美食教室 "天然手作麵包101道" by 周淑玲 and another book as reference for bread making. This book was given by an old old buddy of more than 20 years who took the trouble to go around books store to get me lots of good baking books. Unlike Carol's book which is packed with pictorial illustrations, this 周老师's book is less comprehensive but it compensates by bundling with one free DVD tutorials covering the necessary aspects of bread making.

For this bread, I opted for a No Knead Soft Bread Dough recipe as the base bread to compare it against other bread dough recipes which calls for considerable kneading works. This recipe derives its softness through its high content of oil and sugar, which are also essential factors in producing soft breads.

No Knead Soft Bread Dough 基本面围
免揉超软面包

270g Milk
4.5g Instant Yeast
450g High Protein Flour
90g Low Protein Flour
4.5g Salt
1 Large Egg
90g Unsalted Butter (melted)

Cinnamon Roll Filling 
80g Dark Brown Sugar
Cinnamon Powder


Directions 
  • Combine all ingredients into a mixing bowl. Use the end of a flat rolling pin to stir the contents with each addition until incorporated.
  • Add in melted butter and continue using the tip end of the flat rolling pin to stir the dough for 5-6 mins until combine and the dough becomes soft and elastic. (I did not complete the entire process but rather dump the dough into the stand mixer and allow the mixer to do the kneading. According to the recipe, if one prefers to knead using this 'no knead' formula, the outcome of the bread would be even better and chewy). 
  • Place dough into a slightly grease bowl. Sprinkle water on the dough and cover the bowl with cling wrap. Place the bowl in a warm area and allow it to proof for 60 mins for until double in size.
  • Punch down the dough. Divide and roll the dough into 2 equal parts. Cover and allow to rest for 10 mins.
  • Lightly dust the work top with bread flour.
  • Flatten dough and roll into rectangle shape of 16x12cm of 5-6mm thickness. 
  • Evenly spread sugar over the rectangle dough and follow by cinnamon powder (adjust dosage based on preference).
  • Lightly spray a thin coat of water over the dough to allow the sugar to stick onto the dough. Roll up the dough (beginning from the long side) into a long roulade and pinch to seal the seams securely.
  • Cut 8 equal size rolls and arrange side up on a greased baking pan. 
  • Repeat the same for the other half dough to create another 8 equal size rolls to be arranged onto the same baking pan.
  • Cover and allow the dough to proof for another 50 mins.
  • Apply egg wash over the cinnamon doughs. Sprinkle another thin layer of brown sugar over the doughs.
  • Bake the rolls on the 2nd lowest level of a preheated oven at 180C degrees for 20-22 mins. 


Light Strawberry Cheddar Cheesecake


Baked this batch of cheese cake for my buddy as my hubby went there for business trip two weeks ago. Unlike the normal cheesecake which is dense and creamy rich, this recipe only use small dosage of cream cheese. I have adapted this recipe from the original as I was trying to use up the leftover cream cheese in the fridge. 


I was hoping for the cake  to turn out like the souffle cheesecake, however, after baking the cake ended up like a hybrid between the chiffon and sponge. In my opinion, this cake will serve well for those who are less keen on cheese as there is only a mild tinge of cheesy flavor to it.  


Light Strawberry Cheddar Cheesecake

Ingredients (A)
140g Evaporated Milk
30g Cheddar Cheese
30g Cream Cheese
50g Butter

(B)
110g Superfine Flour

(C)
5 Egg Yolks, 
1 Whole Egg
1 Tbsp Strawberry Extract (I use blended fresh strawberries)
(D)
5 Egg Whites
110g Castor Sugar
1/2 tsp Cream of Tartar

(E) 
Fresh Strawberries for Decoration (optional)


Method
  • Preheat oven at 150C degrees (Upper and Lower Rack).
  • Line and grease bottom and sides of an 9" x 9" square cake mould with parchment paper. 
  • Using a hand whisk, combine and boil (A) in a heat proof saucepan / mixing bowl over low heat. Keep stirring until butter and cheese is fully melted. Remove from heat.
  • Sift in (B) to (A) mixture while it is still warm. Mix well. 
  • Set the above mixture over hot water to keep warm. Add (C) and combine well.
  • In another clean and oil free mixing bowl, whisk egg whites and cream of tartar in (D) until frothy. Add sugar in 2 batches and continue beating until soft peak is formed.
  • Fold 1/3 of the egg whites mixture to egg yolk batter. Mix until just incorporated. 
  • Pour the batter to the remaining egg white mixture. Mix well.
  • Transfer the batter into the prepared pan and bake at under the lower rack 150C degrees for 20 minutes. Reduce heat to 130C degrees and continue to bake for another 35-40 minutes till skewer inserted comes out clean. 
  • Remove cake from oven and immediately drop the cake pan at a height of 30cm onto the kitchen counter top to release the hot air inside the cake.  This process helps to reduce sinkage / shrinkage of the cake upon cooling. Unmould the cake immediately. 
  • To unmold, place a large plate or baking sheet on top of the cake pan, invert the cake pan onto the plate / baking sheet. Remove the cake pan and the parchment paper on the base and sides of the cake. Place a cooling rack on the base of the cake, invert the cake right side up onto the cooling rack and leave to cool immediately. 
  • Chill the cake in the fridge for 2-3 hours or overnight before serving.


Printfriendly

Related Posts Plugin for WordPress, Blogger...